Showing posts with label carrots. Show all posts

Sunday, October 17, 2010

Tossed Sushi with Sesame Vegetables & Egg

Lately, I have been obsessed with Japanese cooking. I have plowed through many books from the library and stocked up on ingredients from my local Japanese market. There are two dishes I have been wanting to make for awhile. One, is the Japanese omelet or tamagoyaki. The other is tossed sushi or chirashi-zushi. The egg didn't work out the way I had planned so I'll spare you the gory details. But, the tossed sushi was delicious. First, I made the sushi rice. I like Nishiki brand sushi rice. I cook mine in my rice cooker on the sushi setting. But, you can cook it on the stove (see recipe at the bottom of this post). While the rice was cooking I made the veggies.


I blanched some spinach, carrot, and edamame in a pot of boiling water with a bit of soy sauce. After a few minutes, I took the veggies out of the hot water, rinsed them in cold water, and tossed them with toasted sesame seed oil, a bit of rice wine vinegar, and toasted sesame seeds.


I put some sushi rice in the bowl topped with some sliced egg, the sesame veggies, and a bit of avocado. I sprinkled some nori strips and toasted sesame seeds on top.


And, then, the secret weapon -- my homemade ponzu sauce. The ponzu sauce adds a nice saltiness and citrus flavor to the dish. It is easy to make and keeps forever in the refrigerator. Chirasi-zushi tastes like sushi but is a lot easier to make and a very flexible recipe. You can add any type of seasonal veggie or protein you like to this dish. And, making tossed sushi is a good way to practice making sushi rice without the pressure of also making the sushi rolls. It is also a good way to allow picky eaters in your family to build their own meal by putting whatever they like over the rice. You will not believe how easy it is to have a sushi bar experience in your home. Give it a try. I don't think you'll be disappointed.


Sushi Rice


1/4 cup rice vinegar

1 1/2 tablespoons sugar

1 teaspoon salt, plus 1 pinch

2 cups short-grain white rice (I like Nishiki)

2 cups of water

1 teaspoon sake, optional


1. Wash rice in several changes of water until water runs clear. Soak in cooking water for 30 minutes (This step is optional but does make the rice nice and sticky). Combine rice with sake, a pinch of salt, and 2 1/2 cups water (if you’re using a rice cooker) or 3 cups water (if you’re cooking it on stovetop). Cook until water is absorbed, about 38 minutes in a rice cooker, about 25 minutes in a covered pot over medium-low heat.


2. While the rice is cooking, cook the rice vinegar, sugar, and salt in a small saucepan over medium heat until the sugar and salt dissolve in the vinegar. Take off burner and let cool.

3. Turn rice into a large bowl and let cool for 15 minutes.

4. Using a rubber spatula, a wooden paddle or spoon, gently fold sweetened vinegar into rice, a little at a time. Rice should be glistening and moist but not wet, and sweet but not overly so. Use immediately with sushi toppings of your choice.

Yield: Enough rice for 4 generous or 6 small portions of sushi.


Sesame Vegetables

Ingredients

1 bunch of spinach
2 cups of carrots, cut into matchsticks
1 1/2 cups of edamame
1 1/2 - 2 tablespoons soy sauce
2 drops of rice wine vinegar
2 teaspoons of toasted sesame oil
2 tablespoons of toasted sesame seeds

1. Heat a pot of water. When it starts to boil add soy sauce and spinach. Cook spinach until slightly wilted about 3-5 minutes. Take spinach out of the pot with tongs and put in a large bowl.

2. Add carrots and edamame to the pot of water. Bring heat up to a boil. Boil for 3-5 minutes. Take veggies out of pot, place in a strainer, and rinse under cold water.

3. Drain water from the bowl containing the spinach. Add edamame and carrots to the bowl. Sprinkle with toasted sesame oil, rice wine vinegar, and toasted sesame oil. Taste and adjust seasoning as you like.

Ponzu Sauce
from www.4peaks.com

1/4 cup of lemon juice
2 tablespoons rice wine vinegar
5 tablespoons soy sauce
1 tablespoon mirin
1 tablespoon dried bonito flakes (hana-katsuo)
2-inch square dried giant kelp (konbu)

Mix ingredients and let stand for 24 hours. Refrigerate. Keep indefinitely.

Tossed Sushi Put a generous scoop of sushi rice in each of 4 bowls. Top rice with sesame veggies, sliced omelet, and avocado. Sprinkle ponzu sauce, nori strips, and toasted sesame seeds on top.

Saturday, August 28, 2010

Sushi Bar at Home

So, I got these lemon cucumbers in my box this week. I thought that I would try to put them in some sushi rolls.


I cut up and peeled the lemon cucumbers and some regular cucumbers that were in my box.


It is hard to believe; but, making sushi at home is really easy. You just make and dress the rice and then roll whatever you like into the nori (seaweed). The key to making good sushi is using good rice. I really like Nishiki Premium Grade Rice.


Making the rolls is not very difficult. You put your nori on a bamboo rolling mat, spread rice on the mat, add filling, and then roll using the mat. This process takes a bit of practice; but, you will quickly get an idea of how much rice and filling you need and how to roll it properly. The rice is super sticky and acts as a glue and that makes the sushi making process fairly easy.


After making the cucumber rolls, I perused the refrigerator and realized I had some avocado and smoked salmon. The cucumber rolls and the smoked salmon/avocado rolls were really good. This is a great cooking project for children because they can spread the rice on the nori, add whatever filling them like, and roll the sushi.


To recreate the sushi bar experience I also made a salad of iceberg lettuce and shredded carrot with a ponzu soy dressing.


Once you get the hang of making sushi at home and stock up on some of the essential items for this dish you will find that sushi makes a nice weeknight meal or a special weekend treat. What can be better than eating sushi in your pajamas?

Sushi rice
Adapted from The Ultimate Rice Cooker Cookbook by Beth Hensperger and Julie Kaufmann

Note: I have a Japanese rice cooker that I use to make my rice; so, I follow this recipe. If you do not have a rice cooker, follow the cooking directions on the back of the bag of your sushi rice and then make the vinegar dressing according to this recipe.

Ingredients:
2 1/4 cups of high-quality Japanese style short- or medium-grain rice
2 1/4 cups of water
2 tablespoons of sake
1/4 cup of rice vinegar
1 tablespoon of sugar
1 teaspoon of salt

1. Wash the rice thoroughly. I put my rice in a thin mesh strainer and cold water over it until the water comes out clear. Add the cooking water. You can let the rice soak for 30 minutes in the cooking water. If you are pressed for time you can skip this step.

2. Add the sake to the rice. If you are using a rice cooker, close the top of the cooker and set for the regular or sushi cycle. If you are not using a rice cooker, follow the cooking instructions on the back of your bag of sushi rice.

3. While the rice is cooking, prepare the vinegar mixture. In a small saucepan, combine the vinegar, sugar, and salt. Simmer over medium heat, stirring occasionally, just until the salt and sugar melt. Remove from heat and allow to cool to room temperature.

4. If using a rice cooker, when the machine switches to the Keep Warm cycle, let the rice steam for 15 minutes. If you are cooking your rice on the stove, when the rice is done cooking take it off the stove and let it slightly cool. You don't want it too cool because the hot rice really holds the sushi roll together.

5. Transfer the rice to a big bowl. Slowly add the vinegar mixture and mix it into the rice.

Maki Sushi
Adapted from The Ultimate Rice Cooker Cookbook by Beth Hensperger and Julie Kaufmann

Ingredients:

1 recipe of sushi rice
6 sheets of sushi nori (roasted seaweed sheets)
Desired fillings -- cucumber, avacado, smoked fish, tofu, shredded carrot work well
Soy sauce, ready-to-eat wasabi
Pickled ginger

Additional Equipment:

Bamboo rolling mat for forming the rolls

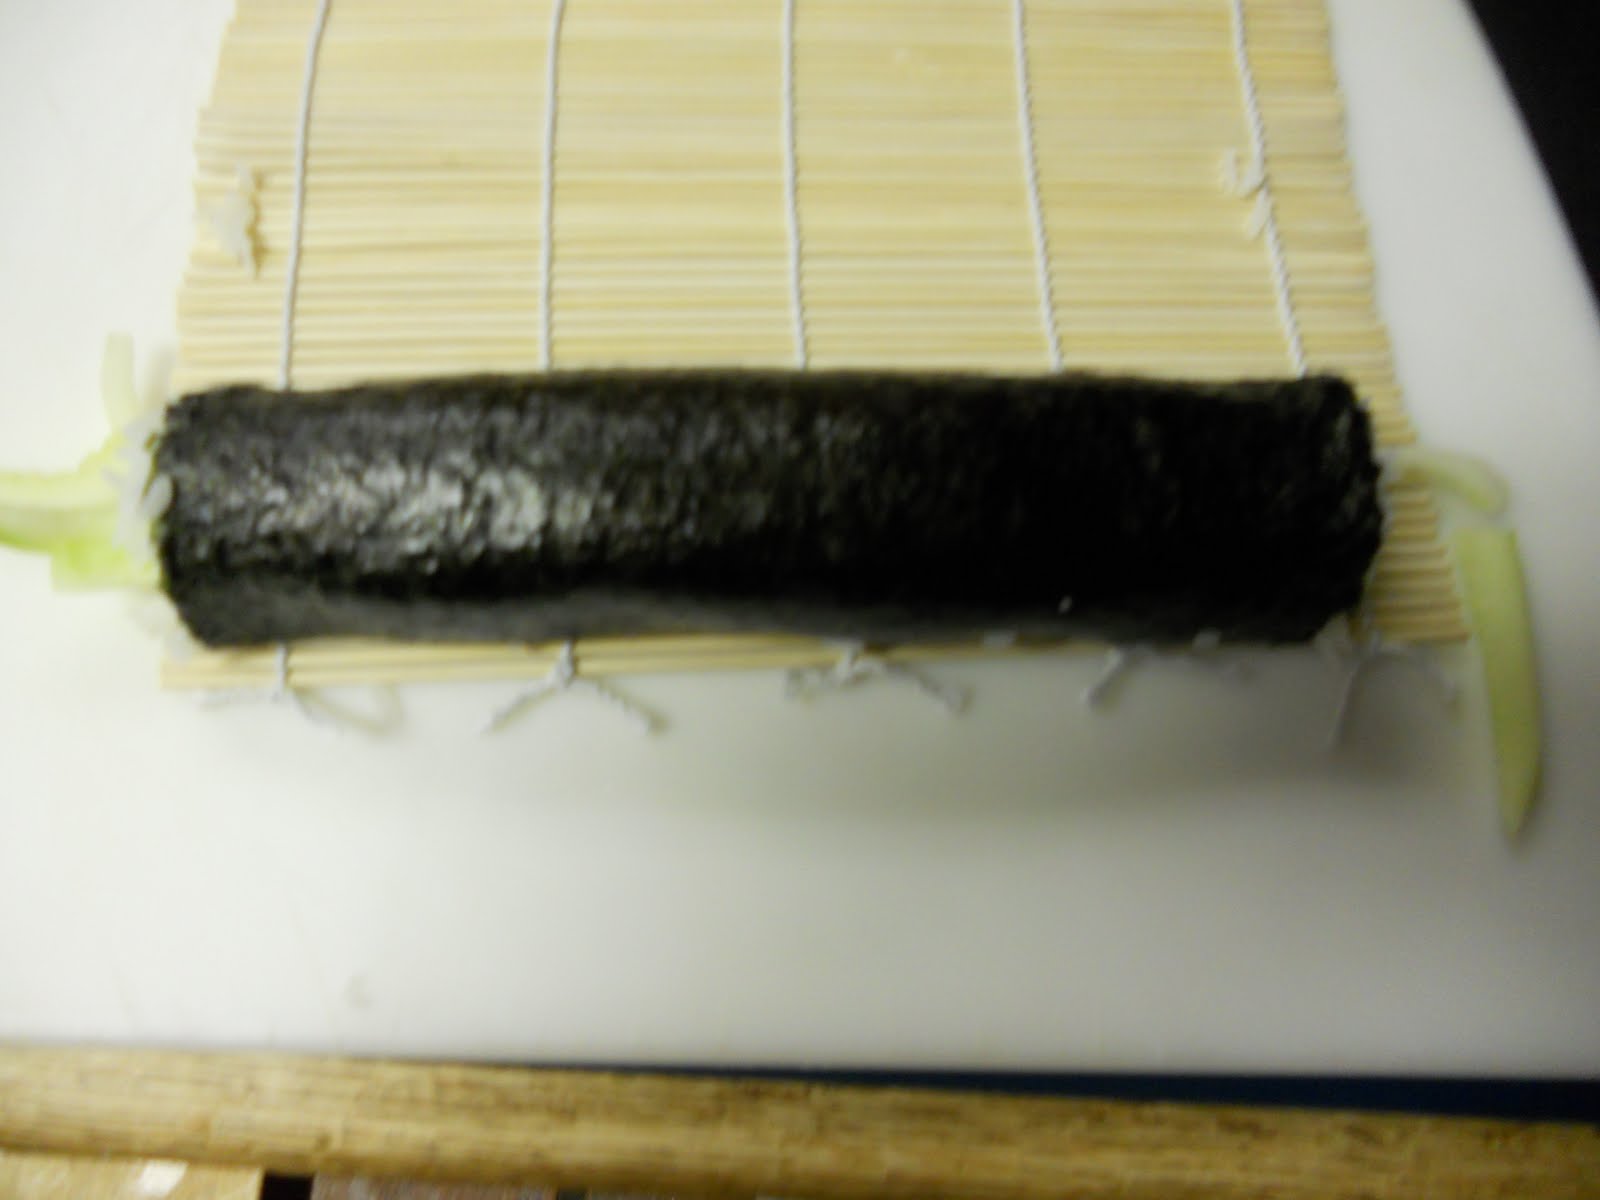
1. Arrange the rolling mat in front of you. Place a piece of nori on the mat. Spread sushi rice on the mat and then arrange your filling in a row near the top of the nori.

2. Lifting the mat, not the nori, begin the roll by bring the strip of rice closest to you to the meet the strip of rice on the other side of the filling. Squeeze the mat gently but firmly, moving your hands along the entire length of the mat, to create a nice even log shape. Now complete the roll, stopping every so often to gently squeeze the mat and shape the roll. At the end, give a final squeeze, hard enough to firm and seal the roll but not so hard that the filling oozes out the ends. If the nori doesn't seal, dip your finger in vinegar and wet the edge of the nori.

3. Cut the roll into 6 pieces. Repeat the rolling and cutting with your five other rolls. Arrange the rolls on a serving platter. Serve with soy sauce wasabi and pickled ginger.

Crispy Salad with Grated Carrots and Ponzu Soy Dressing
Adapted from Everyday Harumi by Harumi Kurihara

Ingredients:

1 small head of iceberg lettuce
1 small carrot, peeled and shredded
1 tablespoon toasted sesame oil
1/4 cup mirin
1/4 cup soy sauce
1 1/2 lemons, juiced
1 inch piece of kombu seaweed (dried kelp), wiped of any salty deposits

1. To make the ponzu soy sauce: Put the mirin in a small saucepan, bring to a boil then reduce the heat to low to cook for a further 2-3 minutes to burn off the alcohol. Take off the head and add the soy sauce, lemon juice, the piece of kombu seaweed, and stir to combine. Leave to cool, then refrigerate.

2. Take make the salad leaves crispy, soak them in iced water then drain well and put in the refrigerator until ready to dress.

3. When you are ready to serve, mix the ponzu sauce and sesame oil together to make a dressing.

4. Put the salad leaves on a serving plate and sprinkle the shredded carrot on top. Pour the dressing over and serve immediately.

Friday, July 2, 2010

Fried Rice with Fava Beans and Carrots

A container of day old (or older) cooked rice is not a welcome sight in most refrigerators. However, this fried rice recipe may change your mind. The best rice for this would be Chinese style steamed rice -- homemade or take out. Sushi rice is also very good. Really, I think any precooked rice would work. The most time consuming part of this dish was prepping the fava beans. If you don't have fava beans or don't feel like prepping them you can substitute fresh or frozen peas. Just thaw them out before adding them to the rice.

How to prep the fava beans. So, here's the quick and dirty guide to prepping fava beans. First, you need to pop the beans out of the pod.


Then boil the beans in salted water for 3- 5 minutes. Let the beans cool. Then, pop them out of their skins with your fingers.

That wasn't so bad. Was it? This is a great job for tiny fingers so if you have child labor available use it! I do!

The rest of the preparation for this dish is very quick and very easy. Feel free to get creative about things you mix in at the end. Think of this dish as a way to use leftovers like cooked meat, cooked veggies, tofu, or any thing else you have lingering in your fridge. Just toss them into the pan after you have coated the rice with the eggs and let them quickly heat up in the pan.


To serve this, I like to put the fried rice in a bowl and sprinkle some toasted sesame oil and chilli garlic sauce on it. Scallions would also be a nice garnish. So, next time you make rice make a bit extra and make some fried rice.


Let me know if you discover other good combinations of meat or veggies for this dish. Have fun and enjoy!

Fried Rice with Fava Beans and Carrots
Inspired by a recipe from The Ultimate Rice Cooker Cookbook by Beth Hensperger and Julie Kaufmann

Ingredients

1 clove of garlic, chopped
2 cups of cold cooked rice
2 eggs lightly beaten
1 pound of fava beans, cooked and prepped
2 carrots, peeled and chopped into small pieces
2 tablespoons sesame seed oil (or neutral oil like vegetable oil)
2 teaspoons soy sauce
1 teaspoon toasted sesame seed oil, plus a dash extra for serving
chilli garlic sauce to taste

1. Prep the fava beans (see above). Boil the carrots in salted water for about 3 minutes -- until tender but not mushy. Strain the carrots and set aside.

2. Heat the sesame oil in a nonstick pan over medium-high heat. Add the garlic and stir fry until fragrant (about 30 seconds). Add the rice, breaking up any clumps. Stir fry the rice allowing it to heat up and grow fragrant.

3. Push the rice over to one side of the pan and pour the eggs into the empty space in the pan. Allow the eggs to cook for a few seconds undisturbed until the bottom starts to set. Then stir the rice into the eggs, folding the rice and eggs over so the rice is evenly covered with egg. Add the fava beans and carrots and stir into the rice/egg mixture. Add the soy sauce and toasted sesame seed oil.

4. Place in a bowl and sprinkle with toasted sesame oil and chilli garlic sauce to taste.

Sunday, June 27, 2010

Spicy Root Vegetable Tagine with Preserved Lemons and Olives

I had a bunch of root vegetables this week (turnips, carrots, and potatoes) and I wanted to do something special with them.


Epicurious had a recipe for Spicy Potato Tagine with Preserved Lemons and Olives by Paula Wolfert. Since, I had some turnips and carrots I decided to add those for some extra flavor and color. You could make this with just potatoes or add other hearty vegetables you have. I think winter squash, sweet potatoes, or eggplant would be nice additions to this dish. And, don't let the term tagine freak you out. You don't need a special pot. I used a regular pan. Just think of tagine as Moroccan for delicious.


I served this lovely tagine with some couscous. I have never made couscous before; but, I read that it is traditionally served with Moroccan food. The couscous was very easy to make (I just followed the recipe on the box). And, it went well with the tagine.


A note about the preserved lemon. I made my own preserved lemons for this dish. I will give you the recipe in my next post. It is super easy and they keep for 6 months in your fridge so it is worth the effort. If you don't feel like making preserved lemons you can just add some lemon juice and zest at the end.


Spicy Root Vegetable Tagine with Preserved Lemons and Olives

Ingredients

1 pound new potatoes
6 turnips, peeled and chopped
2 carrots, peeled and sliced into disks
2 onions, thinly sliced
3 tablespoons extra virgin olive oil
1 tomato, chopped
1/4 teaspoon ground ginger
1/4 teaspoon hot Hungarian paprika
pinch of ground cumin
pinch of cinnamon
1 clove of garlic, chopped
1/4 fresh lemon
2 tablespoons of chopped flat-leafed parsley
2 tablespoons of chopped cilantro
salt
a generous pinch of saffron
1 1/2 cups chicken or veggie stock
24 kalamata olives, pitted
1/2 preserved lemon, chopped

1. Scrub the potatoes and thickly slice into a bowl of cold water.
2. In a heavy saucepan over moderate heat, cook one of the onions in olive oil until it is softened. Add the tomato, ginger, paprika, cumin, garlic, and cinnamon. Cook, stirring, for 2 minutes.
3. Drain the potatoes and add them to the pan along with the turnips and carrots. Add the other onion and the fresh lemon quarter. Toss to coat the potatoes, onion, and lemon with the parsley, cilantro and salt to taste.
4. Heat the chicken broth in a separate little saucepan and add the saffron into it so they saffron can bloom.
5. Add the saffron and hot broth to the pan with the potato mixture. Bring the pan to a boil. Cover the pan and reduce to a simmer. Cook until the vegetables are tender about 40 minutes. 6. Remove the vegetables from the pan and leave the broth and spices in the pan. Add the olives and bring to a boil. Cook at high heat until the broth reduces to a thick sauce. Pour the sauce over the vegetables and garnish with the preserved lemons.