skip to main | skip to sidebar

CSA girl

EATING LOCAL CAN BE FUN


Wednesday, September 29, 2010

Pasta with Fava Bean Pesto

Ah, fava beans, the agony and the ecstasy! At first, I think of the flavor because I love fava beans. Then, I remember the two step process involved in prepping them and I start procrastinating.


It's really not that bad. You just pull the beans out of the pods.


Then put the beans in boiling water for a few minutes and pop them out of their shells. If you have a child around this is a great job for little fingers. Anyway, I had fava beans and basil left from my box. The fava beans were left because I was too lazy to prep them and I totally forgot about the basil. I was very pleasantly surprised to see that I had basil.


Then, I did a websearch for recipes with fava bean and basil pasta and I found this recipe for fava beans and basil pasta at treehugger.com. There are a few steps, but overall this is pretty quick and easy to make. You put half of your cooked and shelled favas in the food processor with basil and garlic. It makes this paste.


Transfer the paste to a bowl. Cook your pasta of choice. Add chopped basil, olive oil and fresh lemon juice to the fava bean paste. When the pasta is cooked, add some of the pasta water to the fava bean mixture. Combine pasta, grated parmesan cheese, the bean mixture, and some pasta water to form a sauce.


And, then you have this delicious bowl of pasta with fava bean pesto.

Pasta With Fava Bean Pesto

Ingredients:

3 cups shelled fresh fava beans
2 cups coarsely chopped fresh basil
2 large garlic cloves, chopped
1/4 cup olive oil (preferably extra-virgin)
2 tablespoons fresh lemon juice

1 pound of pasta

1/3 cup freshly grated Parmesan cheese

1. Cook beans in large pot of boiling salted water until crisp-tender, about 3 minutes. Using slotted spoon, transfer beans to large bowl. Reserve water in pot.

2. Combine 2 cups beans, 1 cup chopped basil and garlic in processor. Using on/off turns, process until beans are coarsely chopped. Transfer mixture to bowl with whole beans. Add remaining 1 cup basil, olive oil and fresh lemon juice. Stir to blend. Season bean mixture to taste with salt and pepper.

3. Meanwhile, cook pasta in same pot of boiling salted water until tender but still firm to bite. Drain pasta, reserving 1 cup cooking liquid. Return pasta to pot.

4. Stir 1/4 cup reserved cooking liquid into bean mixture. Add to pasta. Add 1/3 cup grated parmesan cheese and enough remaining cooking liquid to moisten. Season pasta to taste with salt and pepper and serve.

Posted by CSA girl at 12:55 PM No comments:
Labels: Basil, fava beans

Monday, September 27, 2010

Homemade Quesadillas with Early Girl Salsa


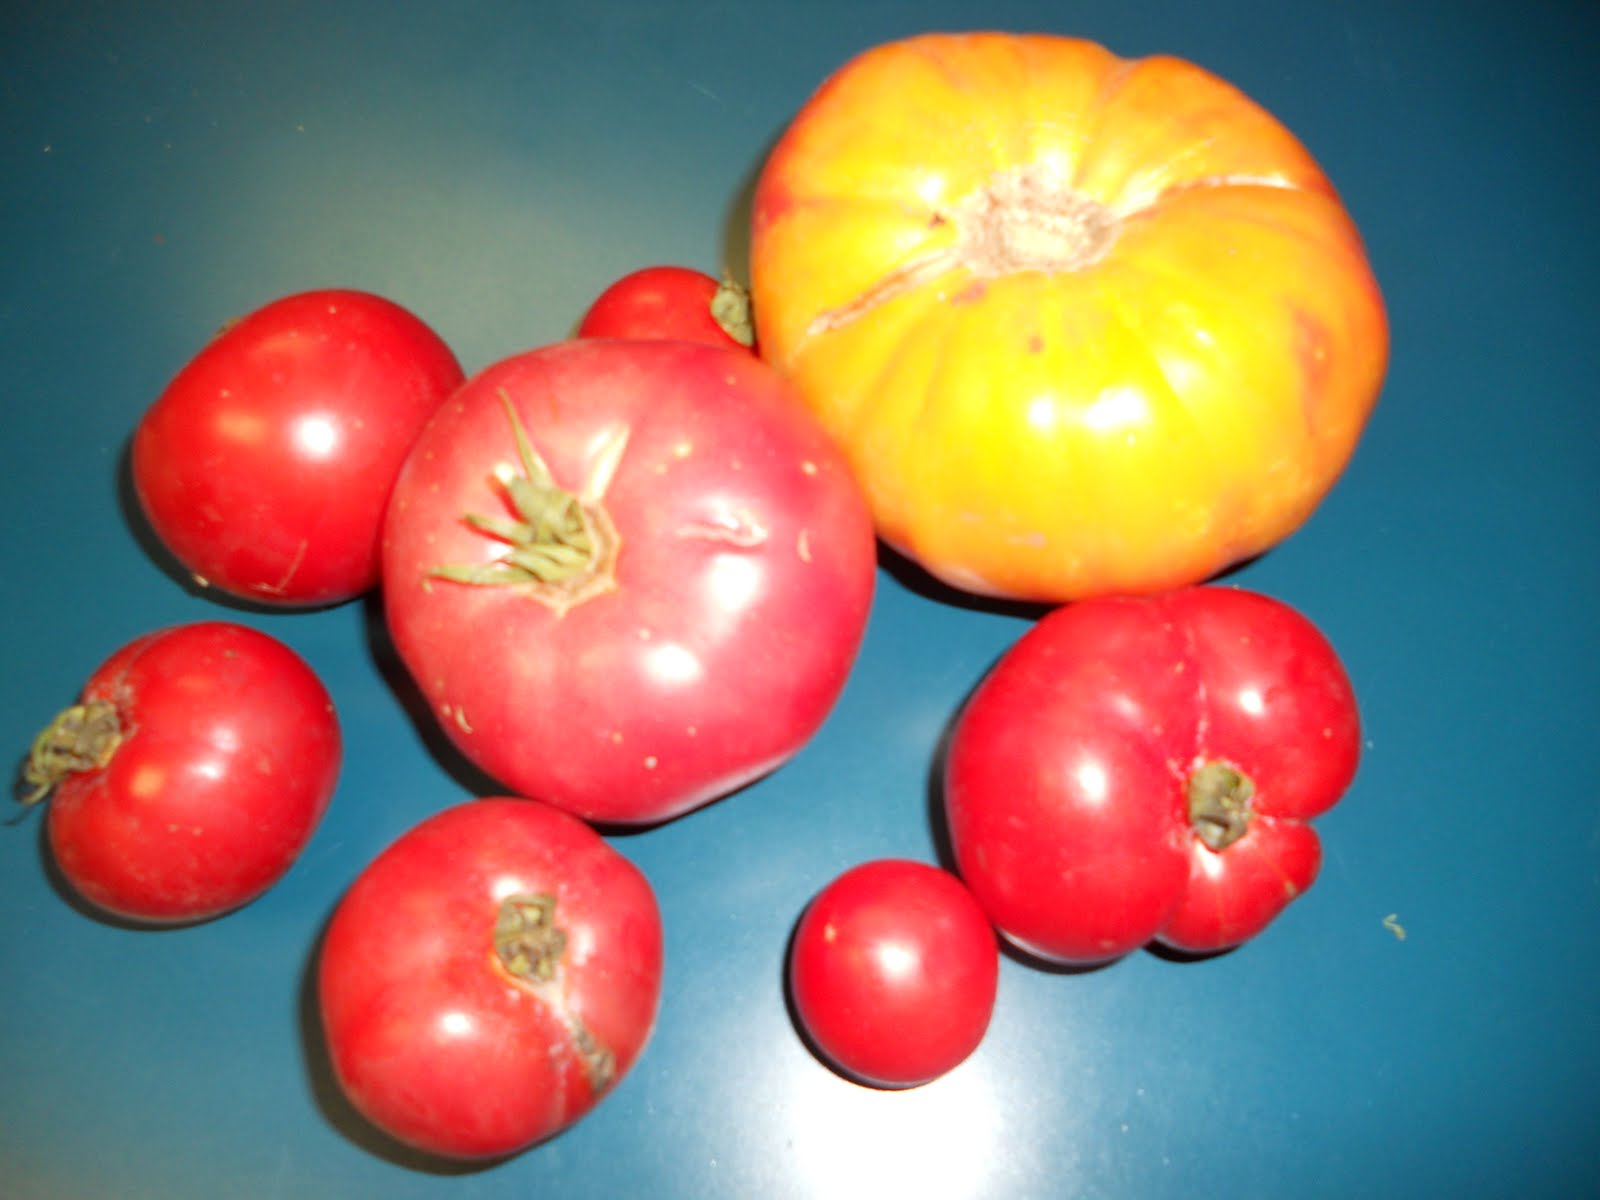
The tomatoes are here! I was so excited to see these Early Girl Tomatoes in my box. My first thought was to make a pasta sauce; but, I just made that last week. I wanted to try something else with these beauties so I decided to make salsa.


I wanted to try something a little different then your basic salsa and I found a recipe in the Dona Tomas cookbook that used roasted tomatoes and dried chiles. It sounded good and I had all the ingredients in my kitchen so I decided to try it out. First, I roasted the tomatoes with some sliced white onion and a few cloves of garlic. After 20 minutes, I took out the onion and garlic and let the tomatoes roast for another hour.


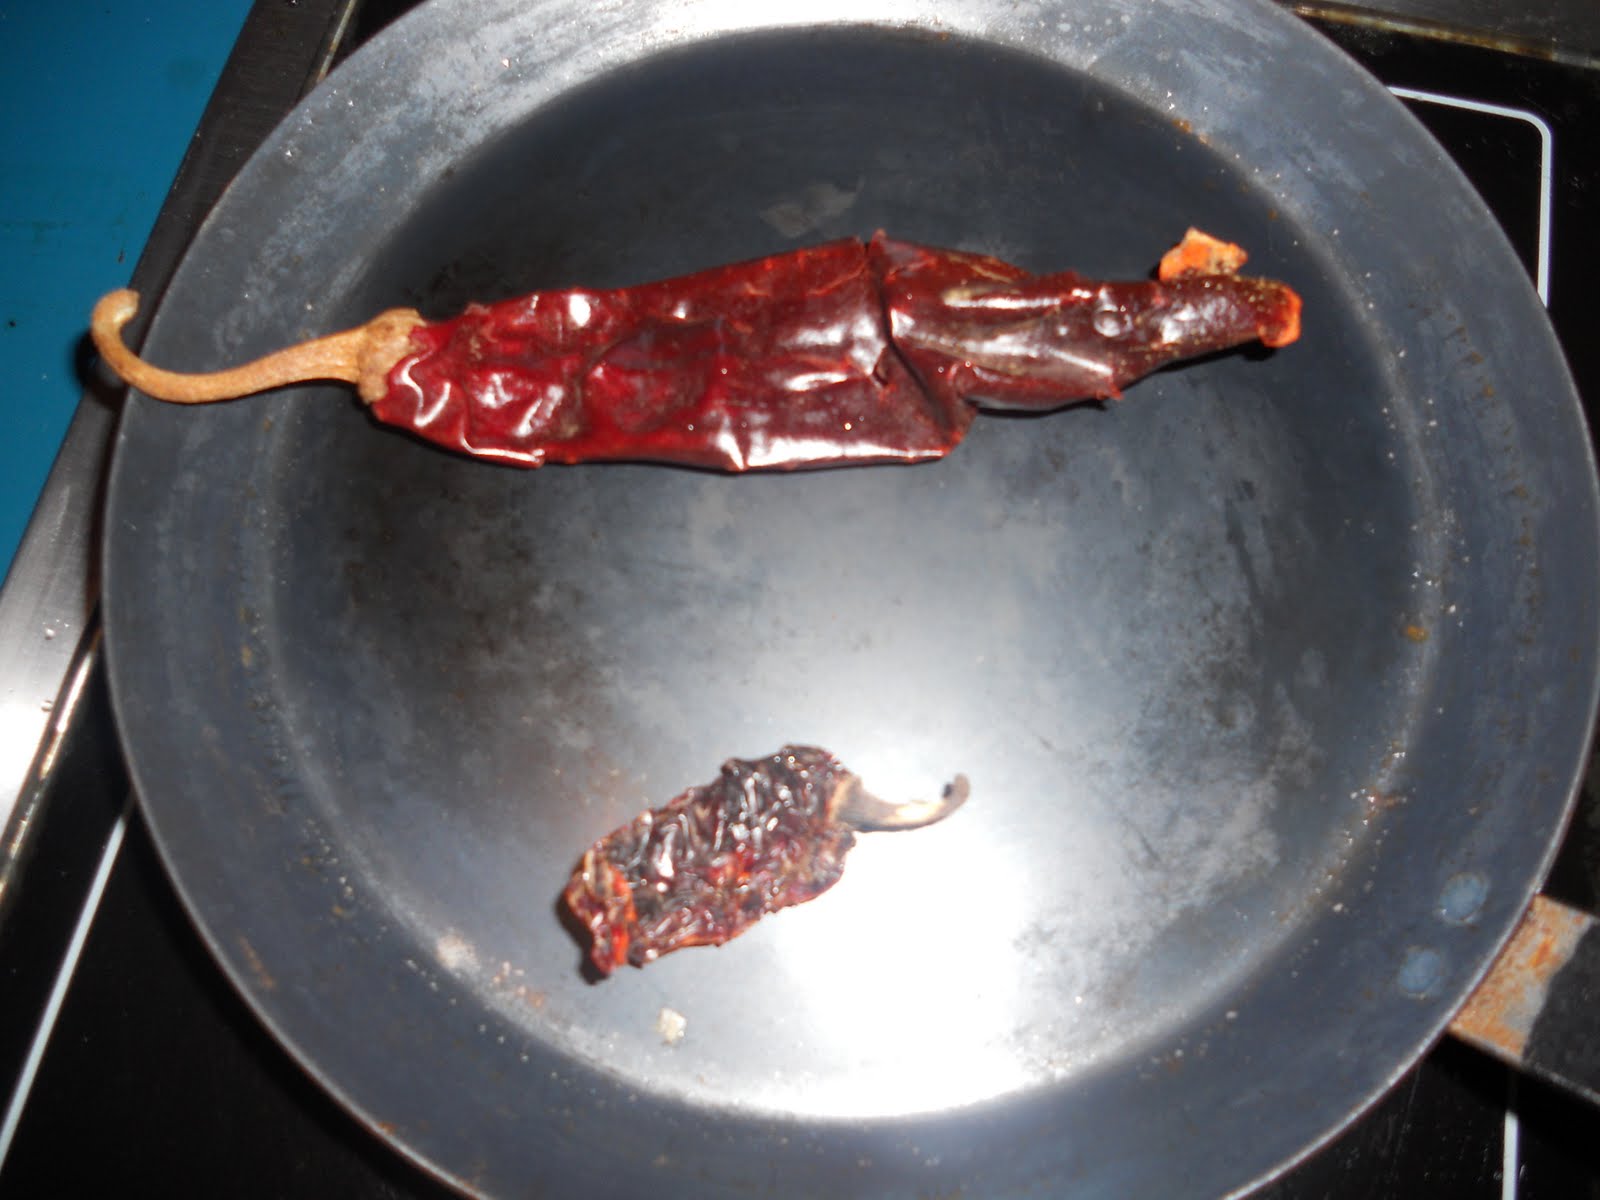
I then roasted a chipotle and a guajillo pepper.


Soaked the peppers in hot water for 30 minutes.


Then, everything goes in the blender with some water and cider vinegar. And, then you have this luscious salsa.


I had some time on my hands and a craving for homemade tortillas so I began to make some corn tortillas. A couple years ago I decided I needed to learn how to make corn tortillas. I tried several different methods without getting a very good tortilla.


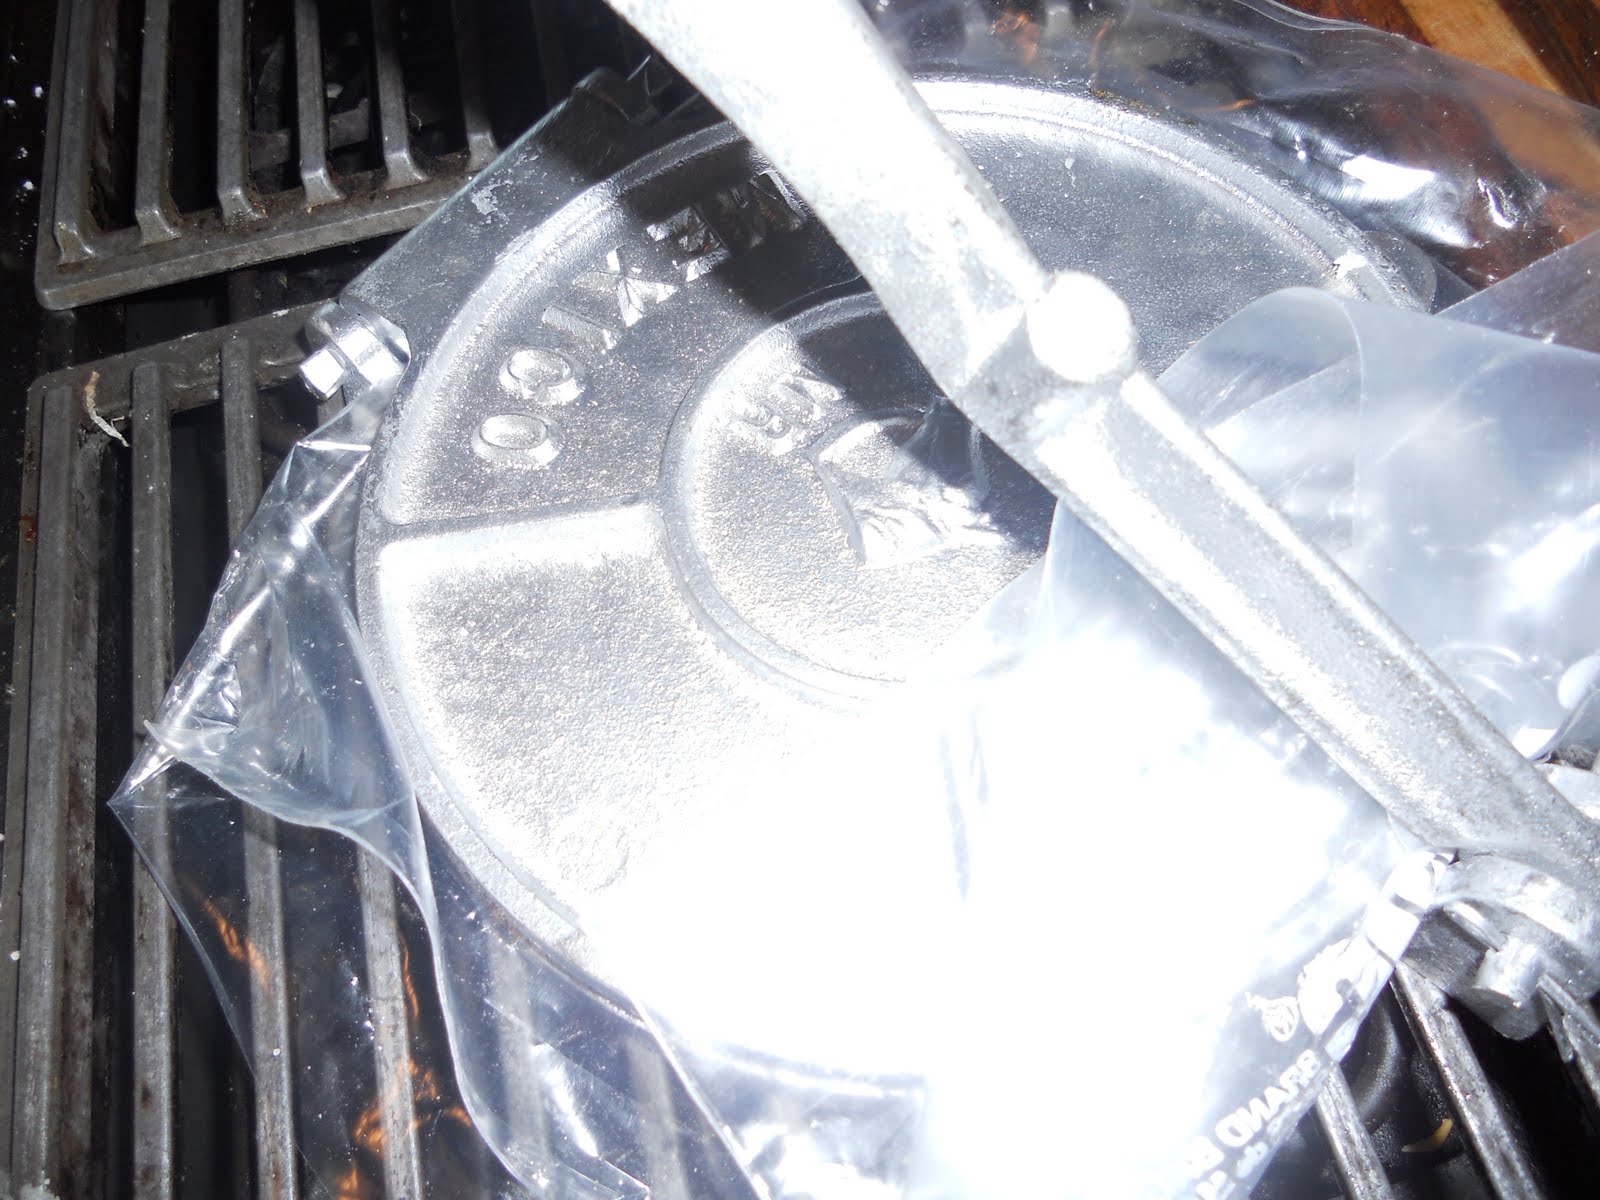
Then one day I bought some MaSeca brand dry masa (dry masa for tortillas) as I was unpacking it I noticed that there were instructions on the masa bag that explained how to make tortillas. The MaSeca instructions were perfect. All you do is add water and salt to the masa seca mix the ingredients until you have a ball of dough. Divide the dough into balls to form the tortillas. Then, you have to flatten the dough balls into tortillas. I use a tortilla press with a cut up plastic bag on it (so the dough doesn't stick). You could probably rig up something to flatten the tortillas; but, tortillas presses are generally inexpensive and do the job perfectly.


Then, you heat a comal (also an inexpensive item) or non-stick pan, add a tortilla, cook 50 seconds on one side and then 50 seconds on the other side. And, you have a perfect, delicious tortilla. This time I decided to add some shredded sharp cheddar to the tortilla, melt the cheese, and flip the tortilla in half to form a half moon shape.


I put some of the quesadillas on a plate with chopped avocado and salsa. You can also just dip the quesadillas in the salsa. I think of this as the Mexican version of grilled cheese and tomato soup. Que delicioso!

Salsa De La Casa
adapted from Dona Tomas: Discovering Authentic Mexican Cooking by Thomas Schnetz & Dona Savitsky

Ingredients:
1 1/2 Early girl or beefsteak tomatoes
3 to 4 cloves garlic
1/4 white onion, sliced
1 dried chipotle chile
1 dried guajillo chile
1/4 cup of cold water
2 tablespoons apple cider vinegar
Kosher salt
1 tablespoon of vegetable oil

1. Preheat oven to 400 degrees. Cover a cooking sheet with aluminum foil. Place the tomatoes, garlic, and onion on the baking sheet. Roast for about 20 minutes, until the edges of the garlic and onion are brown and they become soft. Remove from the oven and transfer the garlic and onion to a bowl. Return the tomatoes to the oven and continue to roast for about 1 hour until the skin blackens. Transfer the tomatoes to the bowl with the garlic and onion.

2. Place a dry skillet over medium heat. Add the chiles and roast for 1 to 3 minutes, pressing them into the pan and turning occasionally with tongs to prevent burning, until the skins are evenly charred and the chiles puff up.

3. While the chiles are hot remove the skin and seeds. Submerge in a bowl of hot water for 30 minutes. Drain the chiles, place in a blender with the 1/4 cup water and vinegar and puree until smooth. Add tomatoes, garlic, and onion. Puree until smooth and season with salt to taste.

Homemade Quesadillas

Ingredients:
MaSeca masa mix
Water
Salt
Shredded sharp cheddar cheese
1 avocado, chopped

1. Make the tortillas according to instructions on MaSeca bag or use store bought tortillas. Heat a tortillas on a non-stick pan.

2. When tortilla is hot add a small handful of shredded cheese. When the cheese melts fold over tortilla. Briefly heat on both sides to make sure the cheese is completely melted and the tortilla is warm.

3. Garnish with salsa and avocado.
Posted by CSA girl at 8:36 AM No comments:
Labels: tomatoes

Saturday, September 25, 2010

Week 18 -- September 23, 2010

Here is this week's box:


In this week's box: apples, basil, cucumbers, curly kale, early girl tomatoes, fennel, sweet bell peppers, spicy serrano pepper, potatoes, and romaine lettuce. Yum, yum, yum! The apples are mostly gone so I guess I'm not making apple crisp. They were just too good to resist. I'm thinking of some salsa and maybe a kale salad. But, you will have to check back later this week to see what I make.
Posted by CSA girl at 2:26 PM No comments:
Labels: CSA box

Tuesday, September 21, 2010

Pasta with Zucchini

It is zucchini time and I know that my fellow CSAers are looking for something to do with all this zucchini. I have been searching for a good pasta with zucchini recipe forever. This weekend I was at a party and ran into my friend Eva. Eva introduced me to the world of CSAs by bringing me my first box of veggies and giving me Deborah Madison's Vegetarian Cooking for Everyone. I asked her if she knew of a good zucchini recipe and she said that Deborah Madison's Spaghetti with Zucchini and Basil recipe was one of her favorites.


She explained to me that you chop the zucchini, cook it for 20 minutes in a good amount of olive oil (1/3 - 1/2 cup) and chopped garlic (2 cloves), add milk, and then mix it with pasta, grated cheese, and fresh basil.


I went home, grabbed my Vegetarian Cooking for Everyone, and surveyed the contents of my kitchen.


I did not have basil; so, I left that out. I had a bag of Trader Joe's Quattro Formaggio shredded cheeses. This mix includes Parmesan, Asiago, Fontina, and Mild Provolone cheeses. The recipe called for Parmesan and Romano; so, I thought the cheese mix I had would work well. I didn't have spaghetti; so, I used ziti.


This dish was really good and a great way to use a lot of zucchini. It does take a bit longer than other zucchini pasta recipes because you need to cook the zucchini in olive oil for 20 minutes and then in milk for 10 minutes. However, it is well worth taking the extra time to make this dish. I highly recommend it. And, I highly recommend playing with the recipe as I did based on what you have in your kitchen. If you have other fresh herbs or cheeses you can experiment. You can also try different types of pasta. I really liked ziti in this dish and I think other short pastas would be nice.

Spaghetti with Zucchini and Basil
from Vegetarian Cooking for Everyone by Deborah Madison

Ingredients
1 1/2 pounds small or medium zucchini
2 cloves of garlic, thinly sliced
salt and freshly milled pepper
1/2 cup half-and-half or milk
1 pound of spaghetti
1/2 cup mixed freshly grated Parmesan and Romano
Handful basil leaves, torn into small pieces

1. Chop the zucchini into 1/2 inch chunks. Warm the olive oil and garlic in a wide skillet over medium heat. Add the zucchini and season with salt and pepper. Cook gently over medium heat, stirring every so often, until the squash is soft and browned in places, about 20 minutes.

2. Cook pasta according to instructions on the package. Drain and set aside.

3. Add the half-and-half or milk (I used milk) and cook for about 10 minutes more, stirring more frequently.

4. Toss the pasta with the zucchini, cheeses, and basil. Season with more salt and pepper to taste.
Posted by CSA girl at 11:40 AM No comments:
Labels: zucchini

Sunday, September 19, 2010

Week 17 -- September 16, 2010

Here's this week's box:


In this week's box: artichokes, celery, cheddar cauliflower, chives, fava beans, garlic, onions, red leaf lettuce, tomatoes, and summer squash. I can't wait to get to the kitchen! Check in later this week to see what I make.
Posted by CSA girl at 7:06 PM No comments:
Labels: CSA box

Wednesday, September 15, 2010

Pizza with Rainbow Chard and Cremini Mushrooms

I got this vibrant rainbow chard in my box last week and I can't believe I haven't eaten it yet.


Also, I bought a couple balls of pizza dough from my favorite pizzeria -- Howie's Artisan Pizza in Palo Alto. I had one dough ball left and I know that this dough is best eaten right away. So, I decided to try an experiment. Would chard taste good on pizza?


I rolled out the dough, brushed it with garlic infused extra virgin olive oil, and then topped it with shredded mozzarella and fontina cheeses.


Baked it in a 450 degree oven for about 10 minutes.


I sauteed the rainbow chard and cremini mushrooms. I set the toppings on the table next to the pizza.


I topped my pizza with chard and cremini mushrooms. Chard is good on pizza! And, it is even better with sauteed mushrooms. I also like the idea of making a plain cheese pizza and then setting up a topping bar where everyone can choose their toppings. What a great idea for a party! Now I just have to think of a cocktail to serve with it.

Pizza with Rainbow Chard and Cremini Mushrooms

1 ball of pizza dough
Olive oil
4 cloves of garlic, chopped
red pepper flakes
1 bunch of rainbow chard, stems and leaves separated
1 -2 handfulls of cremini mushrooms, stemmed and thinly sliced
1 lemon, sliced
salt

1. Place pizza stone in your oven on or near the bottom. Preheat oven to 450 degrees. Put about 1/4 cup of olive oil in a small bowl with 2 chopped cloves of garlic. Let this stand for about 30 minutes so the garlic can infuse the olive oil.

2. Heat 1 tablespoon of olive oil in a pan over medium high heat. Add 1 clove of chopped garlic and a bit of red pepper flake into the pan and allow to cook for about 30 seconds until fragrant. Add the chard leaves and toss with the garlic oil mixture. Cover and cook for 3-5 minutes -- until leaves are cooked. Take off cover and cook for a few more minutes. Take over burner and sprinkle with salt. Squeeze a slice of lemon over the chard. Transfer chard to a plate or bowl.

3. Clean out pan. Add 1 tablespoon of olive oil to the pan and heat over medium high heat. Add garlic and cook for about 30 seconds -- until fragrant. Add mushrooms and cook for 3-5 minutes. Sprinkle with salt and the juice of one slice of lemon.

4. Stretch or roll pizza dough into desired shape and size. Place on a pizza peel or pan. Brush garlic infused olive oil over the dough. Top with mozzarella and fontina cheese. Bake in the over for 8-10 minutes -- until cheese is melted and crust is light golden brown.

5. Top the pizza with the sauteed chard and mushrooms or slice pizza and allow each person to add the toppings they like.
Posted by CSA girl at 10:25 AM 2 comments:
Labels: mushrooms, pizza, rainbow chard

Monday, September 13, 2010

Slow-Roasted Tomato Sauce

I got some beautiful tomatoes in my CSA Box. Then, a friend came over and brought more tomatoes. I knew I wanted to make a pasta sauce with these beauties; but, I wasn't sure what to make. I have made a raw tomato sauce with garlic, olive oil, and basil. That was pretty good. I have also made a cooked tomato sauce with onion, celery, carrot. That was good as well. But, I wanted to try something new. I was going through some of my cookbooks when I came across this recipe for Slow-Roasted Tomato Sauce in Vegetables Every Day by Jack Bishop. Mr. Bishop states that, "I consider this the best tomato sauce in my repertoire." I felt compelled to try this and it was a lazy sunday afternoon; so, I had several hours to let the tomatoes slowly roast in the oven.


This recipe is very simple; but, does require several hours of cooking time. Believe me it is well worth the wait. This is the food of the Gods. If the Roman Gods on Mt. Olympus ate tomato sauce it would be this sauce.


First, you chop up the tomatoes and season them with salt and pepper. Then, bake them at 250 degrees for 3 hours -- turning the cooking sheets a few times.


Then, a quick whirl in the food processor.


Add a couple tablespoons of extra virgin olive oil.


And, you have a truly amazing tomato sauce. I also used a method I found in The Splendid Table's How to Eat Supper to coat the pasta. After the pasta was cooked, I mixed the pasta with grated Parmigiano-Reggiano and then I add the pasta sauce. I really like this method because the cheese melts on the pasta and add a nice texture and saltiness to the sauce.


Then, I sprinkled a bit more Parmigiano-Reggiano at the end. As the great Ms. Mae West said, "Too much of a good thing can be wonderful." In this case, that certainly is true. However, the sauce is really good so if you want to add less cheese the dish will still taste really good.

Slow-Roasted Tomato Sauce
Adapted from Every Day Vegetables by Jack Bishop and The Splendid Table's How to Eat Supper by Lynne Rosetto Kasper and Sally Swift

Ingredients

5 large ripe tomatoes (About 3 1/2 pounds), cored and cut crosswise into 1/2-inch-thick slices
1 teaspoon kosher salt
Freshly ground black pepper
2 tablespoons extra-virgin olive oil
1 pound of pasta
1 generous cup fresh-grated Parmigiano-Reggiano cheese

1. Preheat oven to 250 degrees. Line two large baking sheets with aluminum foil.

2. Spread tomatoes out over the baking sheet in a single layer. Sprinkle with salt and pepper to taste. Roast, turning the baking sheets occasionally and switching their position in the oven once, until tomatoes are extremely condensed and shriveled, about 3 hours.

3. At the end of the 3 hours, cook the pasta according to the instructions on the box.

4. Carefully transfer tomatoes to a food processor. Puree the tomatoes into a smooth, thick sauce.

5. Drain the pasta. Sprinkle 3/4 of the Parmigiano-Reggiano cheese on the hot pasta and allow it to melt. Add the pasta sauce to coat. Save any excess sauce. It can stay in the refrigerator for several days in an airtight container or frozen for several months. Sprinkle cheese over the pasta with sauce to taste.
Posted by CSA girl at 1:42 PM No comments:
Labels: pasta, Tomato

Sunday, September 12, 2010

Week 16 -- September 9th

Here is this week's box:


In this week's box: artichokes, broccoli, chard, cucumbers, dill, gravenstein apples, leeks, strawberries, tomatoes, and zucchini. Check in later this week to see what I make.
Posted by CSA girl at 11:49 AM No comments:
Labels: CSA box

Wednesday, September 8, 2010

Cheesy Scrambled Eggs with Gypsy Peppers and Onions

I had some elaborate plans for these pretty little Gypsy peppers that were in my CSA box.


But, at about 6 p.m. last night I got hungry and lazy at the same time and I started to look around my fridge. While perusing the contents of my fridge, I sauteed the peppers with some onions in olive oil -- always a good start.


I had a lot of my Pie Ranch eggs left over from the last 2 weeks and I felt that I needed to play a bit of catch up before I get more eggs this week. I also had a lot of grated colby jack cheese, salsa, and tortillas. So, I put the eggs in a bowl with a bit of milk and some salt and pepper and whisked them. I put them in the pan with the peppers and onions, scrambled them, and then added a handful (or two) of grated cheese.


I put some salsa on the eggs and I served them with some refried beans and tortillas. These eggs would also be good with the Balsamic Roasted Fingerling Potatoes that I posted earlier this week. They are good for breakfast, lunch or dinner. And, feel free to substitute other types of cheese -- goat cheese, gruyere, mozzarella, fontina, or any cheese that melts well would work with this recipe.


Cheesy Scrambled Eggs with Gypsy Peppers and Onions

Ingredients

4 gypsy peppers, seeded and chopped
1/2 of a large onion, chopped
1 tablespoon of olive oil
6-8 eggs
6 tablespoons of milk
salt and pepper to taste
1 - 1/2 cups of grated colby jack cheese

1. Heat the olive oil in a large non stick skillet over medium high heat. Add the peppers and the onion and sauteed until the veggies are soft.

2. In a large bowl, whisk the eggs with the milk. Add salt and pepper to taste.

3. Add the eggs to the skillet and cook for 3-4 minutes (until the bottom is slightly set). Then move the eggs around the pan. Add some cheese while the eggs are still runny. Finish cooking the eggs to your taste. I like mine cooked all the way but still light yellow. Add some more cheese at the end, allow it to melt, and serve.

Serving suggestions: You can serve these eggs with refried beans, salsa, and tortillas or they would be good with the Balsamic Roasted Fingerling Potatoes that I posted earlier this week.


Posted by CSA girl at 1:45 PM No comments:
Labels: eggs, gypsy peppers

Tuesday, September 7, 2010

Balsamic Roasted Fingerling Potatoes

Almost every vegetable tastes good roasted. When I saw these beautiful fingerling potatoes in my box I knew I had to roast them.


So, I preheated the oven to 450 degrees. I cut them into wedges and tossed them with olive oil and salt and pepper.


After the potatoes are nice and crispy I sprinkled some balsamic vinegar on them and then put them back in the oven for a few minutes.


They look good and taste even better.

Balsamic Roasted Fingerling Potatoes

Ingredients

1 pound of fingerling potatoes, washed and halved
2 1/2 tablespoons of extra-virgin olive oil
1 tablespoon of kosher salt
1/2 teaspoon of fresh ground pepper
2-3 tablespoons of balsamic vinegar

1. Preheat your oven to 450 degrees. Prepare your potatoes wedges. Try to cut each wedge into a similar size.

2. Put the wedges on a rimmed baking sheet. Toss them with olive oil and salt and pepper.

3. Roast for 20-25 minutes until fork tender.

4. Sprinkle with balsamic vinegar, shaking them pan to coat the potatoes. Roast them until the vinegar evaporates about 4 minutes.

5. Season with some salt and pepper to taste.
Posted by CSA girl at 8:40 AM No comments:
Labels: fingerling potatoes

Monday, September 6, 2010

CSA Girl guest blogs for Livestrong.com

Hi all! Please check out my debut on Livestrong.com as a guest blogger. I wrote a short introduction to CSAs. I hope you like it!

Posted by CSA girl at 11:57 AM No comments:

Friday, September 3, 2010

Week 15 -- September 2nd

Here is this week's box:


In this week's box: cilantro, cucumbers, fingerling potatoes, green onions, lacinato kale, peppers (bell & gypsy), red cabbage, summer squash, watermelon radish. Oooh, that cilantro smells good! I may have to make some salsa. Check back later this week to see what I make.
Posted by CSA girl at 3:24 PM No comments:
Labels: CSA box

Wednesday, September 1, 2010

Braised Artichokes

For the last two weeks I have been getting artichokes in my CSA box.


For those of you who have never prepared artichokes here is Rule #1 of artichoke prep -- just keep peeling. In order to prepare artichokes, you need to peel off all the hard outer leaves; and, there are usually a lot of them. Keep peeling them off until you reach softer yellower leaves.


You also need to cut off the rough top portion and pull out the choke. The choke is this hard prickly stuff you find in the center when you cut the artichokes in have lengthwise. These artichokes didn't have a choke. But, if your artichokes do have chokes -- scoop them out with a spoon or a small knife. Finally, peel the rough outer part of the stem with a vegetable peeler. Rule #2 of artichoke prep -- take off anything that is hard or prickly. If you don't want to have to tear it apart with your teeth then just cut it off.


After you prep the artichokes you can keep them in some cold water with a bit of lemon juice. Or, you can just cook them. I got this braising recipe from Mark Bittman's Minimalist column in the New York Times. I really like it because it is quick, easy, and delicious. First, you melt some butter in a pan and then you brown the artichokes in the butter.


Add some chicken stock, cover the pot, and let the artichokes cook until they are soft (about 20 minutes). Take the artichokes out and reduce the liquid to a sauce, add a bit more butter and the juice and zest of one lemon, and enjoy. I recommend getting a nice crispy baguette to sop up some of that sauce. It is veggie gold.


Don't let the crazy prepping scare you away from making artichokes. Once you get the hang of it is really easy. And, you can make this easy and elegant dish at home. Bon Appetit!

Braised Artichokes

from Mark Bittman's Minimalist column in the New York Times

Ingredients

4 medium artichokes

4 tablespoons butter ( 1/2 stick)

1 cup chicken stock, or more as needed

Salt and freshly ground pepper

Zest and juice of 1 lemon.

1. Remove the tough outer leaves of the artichoke and cut off the rough part on top. Cut each of the artichokes in half and remove the choke. Use a vegetable peeler to peel the tough outer part of the stem.

2. Put 3 tablespoons of the butter in a large, deep skillet over medium-high heat. When it melts and foam subsides, add artichokes, cut side down. Cook until lightly browned, about 5 minutes. Add stock (it should come about halfway up the sides of the artichokes), bring to a boil, and cover; turn heat to medium-low. Cook for about 20 minutes or until tender, checking every 5 or 10 minutes to make sure there is enough liquid in the pan, adding more stock as necessary. Sprinkle with salt and pepper, and transfer artichokes to serving platter.

3. Raise heat to medium-high and cook, stirring occasionally, until liquid is reduced to a sauce. Stir in lemon zest and juice and remaining tablespoon butter; taste and adjust seasoning. Serve artichokes drizzled with sauce.

Yield: 4 servings.

Note: I used 1 tsp of Better than Bouillon mixed with 1 cup of hot water instead of ordinary chicken stock. I highly recommend this stuff. It was really good.


Posted by CSA girl at 7:38 PM 2 comments:
Labels: artichokes
Newer Posts Older Posts Home
Subscribe to: Posts (Atom)

CSA GIRL HAS A NEW BLOG

My new blog is called edamamemonster. You can find it at http://edamamemonster.wordpress.com. I hope you like it!

Search This Blog

Subscribe To

Posts
Atom
Posts
All Comments
Atom
All Comments

WHAT IS A CSA?

CSA stands for Community-supported agriculture. A CSA consists of a community of individuals who pledge support to a farm operation where the growers and consumers share the risks and benefits of food production. CSAs usually consist of a system of weekly delivery or pick-up of vegetables and fruit in a vegetable box, sometimes including dairy products, meat, or eggs. To find a CSA in your area go to www.localharvest.org/csa/.

If you have any questions please e-mail me at csagirlcal@gmail.com. I would be happy to help you find a CSA or answer questions you have about joining one.

Followers

Blog Archive

  • ►  2011 (1)
    • ►  February (1)
  • ▼  2010 (69)
    • ►  November (2)
    • ►  October (11)
    • ▼  September (13)
      • Pasta with Fava Bean Pesto
      • Homemade Quesadillas with Early Girl Salsa
      • Week 18 -- September 23, 2010
      • Pasta with Zucchini
      • Week 17 -- September 16, 2010
      • Pizza with Rainbow Chard and Cremini Mushrooms
      • Slow-Roasted Tomato Sauce
      • Week 16 -- September 9th
      • Cheesy Scrambled Eggs with Gypsy Peppers and Onions
      • Balsamic Roasted Fingerling Potatoes
      • CSA Girl guest blogs for Livestrong.com
      • Week 15 -- September 2nd
      • Braised Artichokes
    • ►  August (10)
    • ►  July (16)
    • ►  June (14)
    • ►  May (3)

About Me

CSA girl
I left my job a few years ago and discovered that I loved to cook. Like many other foodies, I found that the best meals are made from fresh local produce. So, last year I joined the CSA at Blue House Farm in Pescadero. This year I decided to share with my fellow locavores what I make with the produce in my CSA box each week. I plan on posting two recipes a week. If you have any ideas for recipes or comments please e-mail me at csagirlcal@gmail.com.
View my complete profile